
I like using terminal and CLI-based tools. I find that removing the additional UI layer and relying on textual information works good when I want to achieve one thing. CLI applications are perfect for this use-case. In this blogpost, I will explain how I come to build the tool interop.
What is interop?
Interop is a CLI tool that makes project-based command execution easier and more convenient. You can define commands which can be any one liner bash script or an executable program binary that you previously built. You can either run those through interop globally, or you can define projects which can become a context to run those commands.
here is the full feature set interop offers
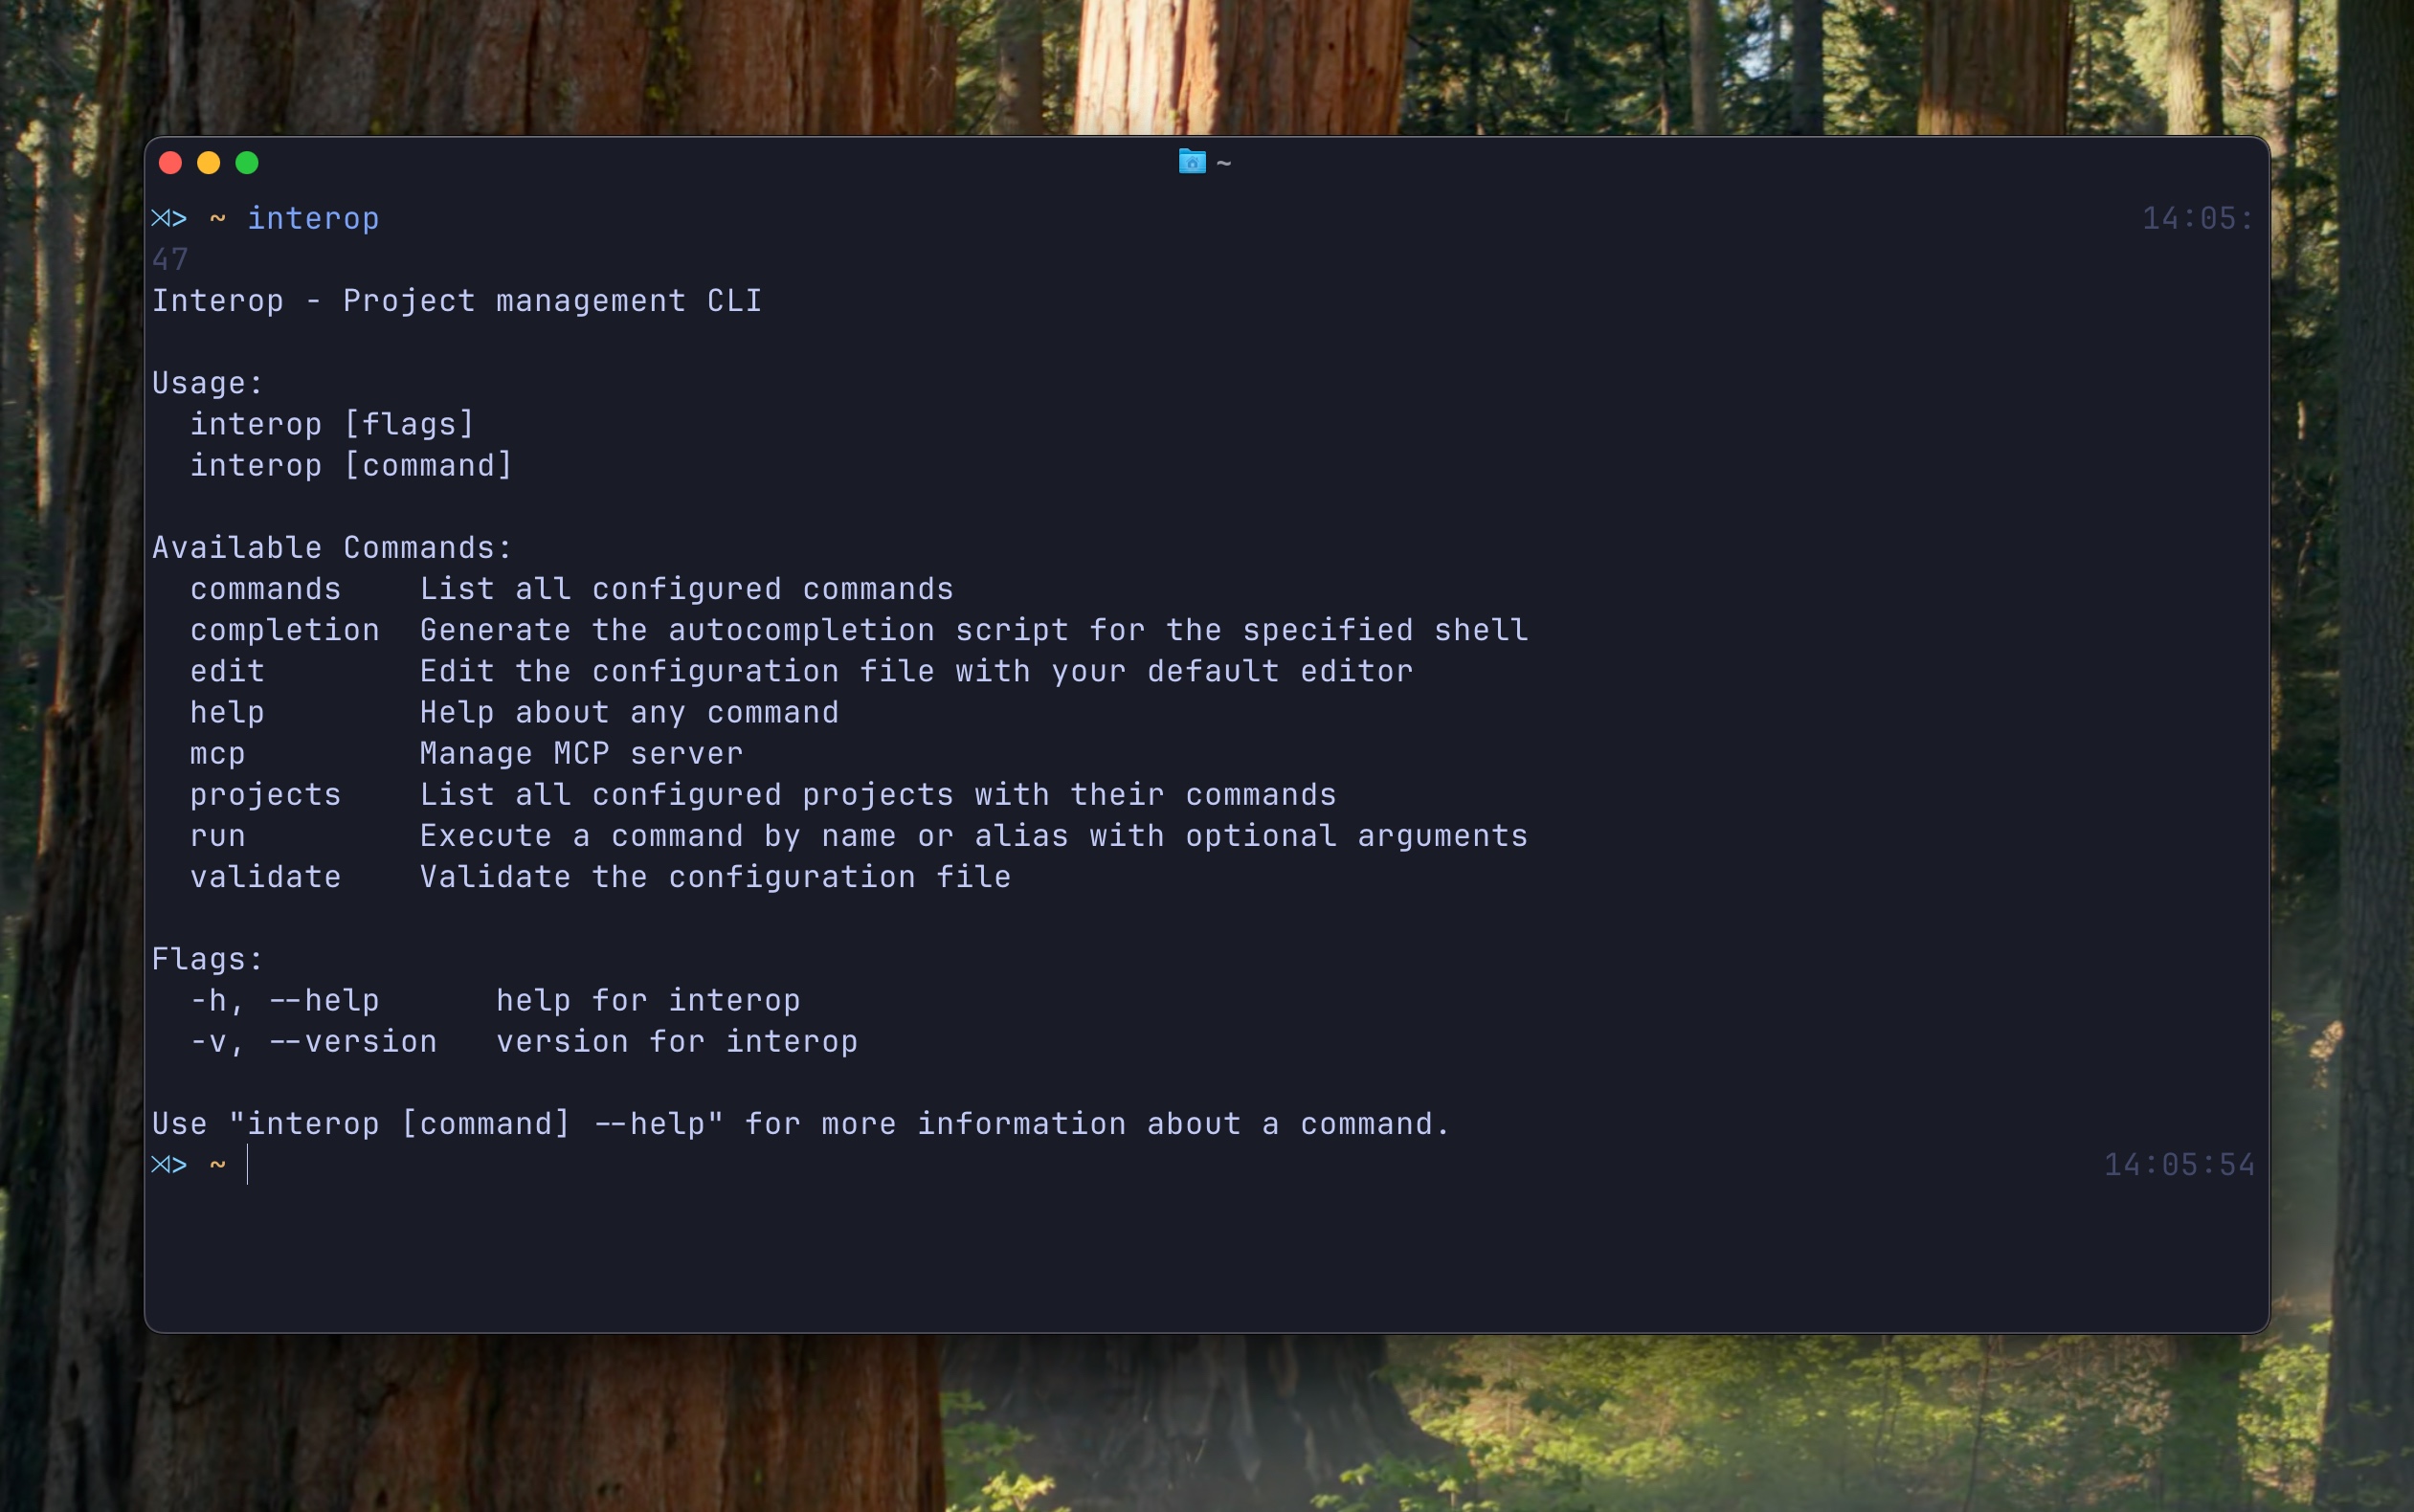
Let’s go over the features 👇🏻
Command Execution
The initial goal for the project was to create a way for me to run commands and scripts I define from any terminal. There are alternative ways to accomplish this, but I wanted more flexibility and a solution I could customize with a limited set of rules.
Commands are defined either as an executable or a one liner script like you would in the terminal. Here is how you define a command:
[commands.build-app]cmd = "go build -o ${output_file} ${package}"description = "Build a Go application"is_enabled = trueis_executable = falsearguments = [ { name = "output_file", type = "string", description = "Output file name", required = true }, { name = "package", type = "string", description = "Package to build", default = "./cmd/app" }]You can list the commands using commands flag and run them using run command.
Project as Context
Once I implemented command execution, it made sense to bind commands to project locations. This way, I could run a command from anywhere and still have it execute in the project location.
The system supports three types of commands:
-
Global Commands
- Commands not bound to any project
- Available and executable from any location
- Default behavior for unbound commands
-
Project-Bound Commands
- Commands specifically tied to a project location
- Only executable within the project context
- Maintains project-specific environment and settings
-
Hybrid Commands (Project-Bound with Alias)
- Commands that can be executed in both global and project contexts
- Two ways to execute:
- Using command name: Executes in global context
- Using project alias: Executes in project context
- Provides flexibility while maintaining project-specific functionality
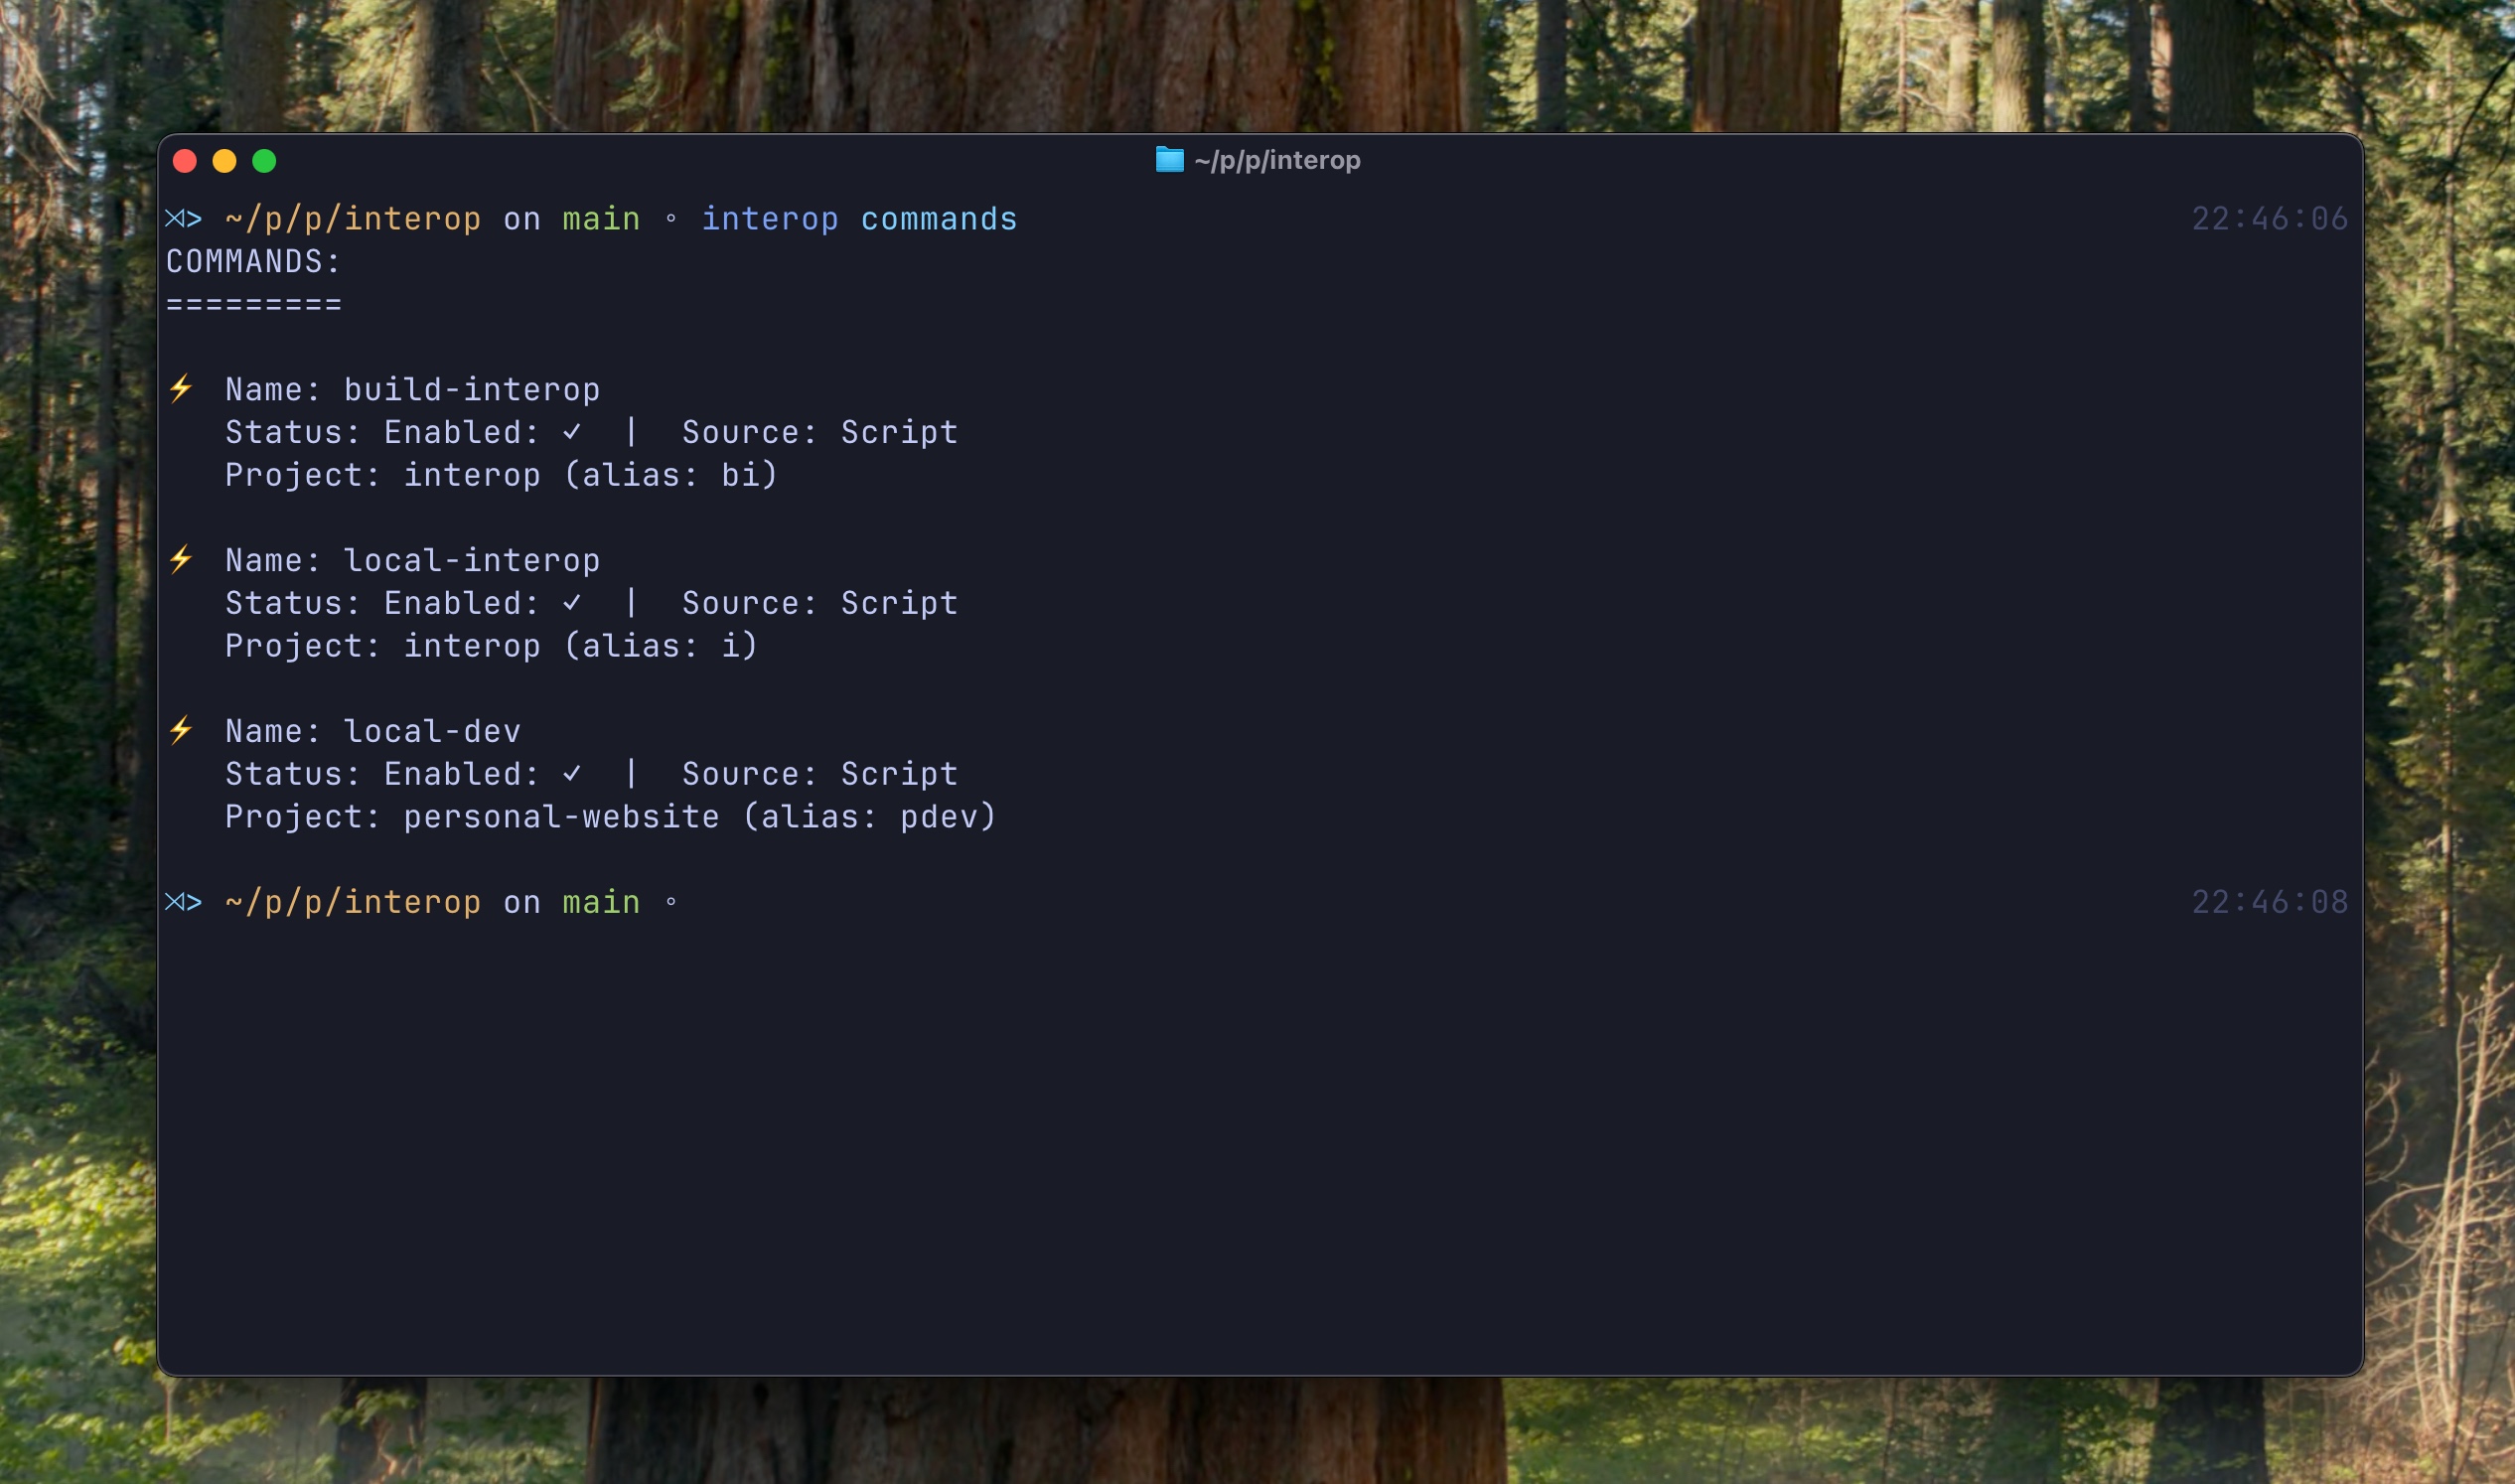
You can also see the projects and bounded commands if any using projects command.

Configuration & Validation
I decided to use the toml format for configuration. It is both more readable and extensible. By default, project settings are placed under .config/interop. You can open the file automatically from the terminal using the edit command.
Here is an example configuration
log_level = "verbose"
[projects.personal-website]path="~/projects/personal/personalWebsite"description="My personal website"commands=[ { command_name ="local-dev", alias="pdev" }]
[projects.lazydraft]path="~/projects/personal/lazydraft"description="Lazydraft application, tool that makes transferring blogsposts from obsidian to my personal website easier"
[projects.interop]path="~/projects/personal/interop"description="Tool for executing project based commands"commands = [ {command_name ="build-interop", alias = "bi"}, { command_name="local-interop", alias = "i"}]
[commands.build-interop]cmd="go build -o interop cmd/cli/main.go"
[commands.local-interop]cmd="./interop"
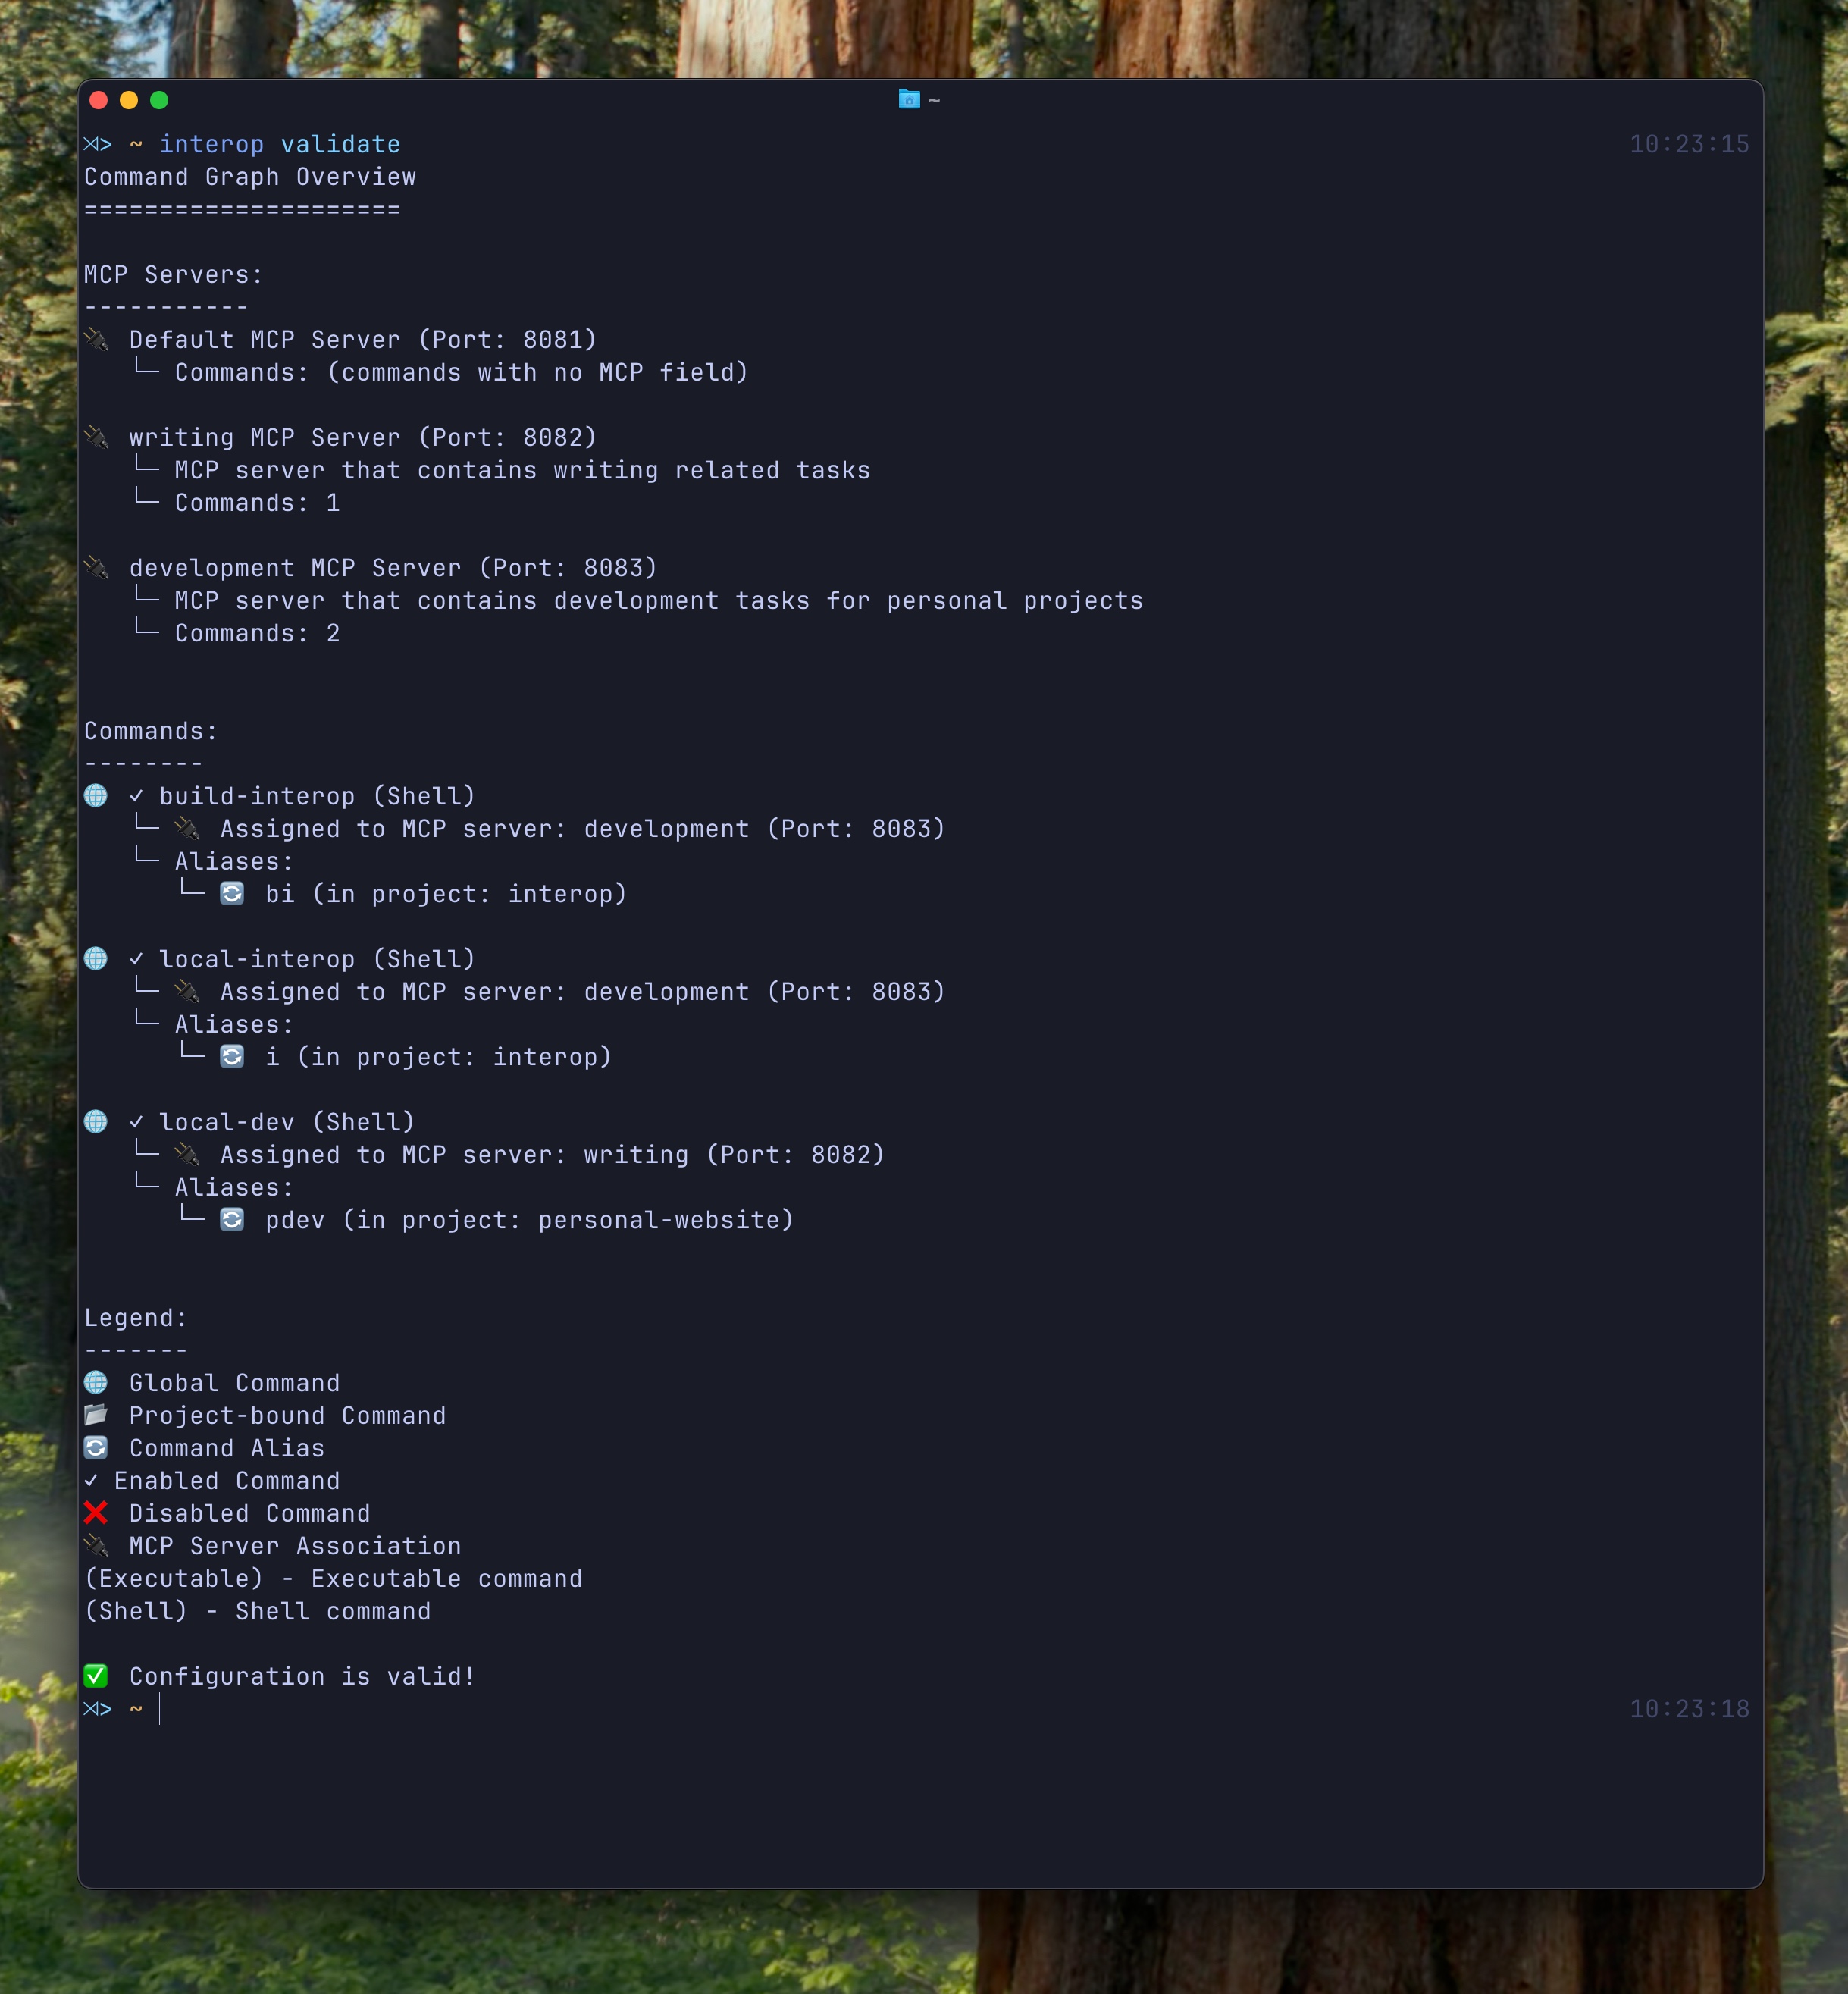
[commands.local-dev]cmd="npm run dev"Rules for commands and projects can be validated using validate command. This also displays the statuses of commands and their relationship with projects. If there are any misconfiguration, user can fix them through the warnings.
Local MCP (Model Context Protocol) Servers
MCP (Model Context Protocol) servers are the API layer LLM’s use to accomplish certain tasks. Functions are defined as tools to these servers and from their name and description, LLM can assess whether it should be used for the prompt it is given or not.
Since interop enables you to run arbitrary scripts or executables locally, it made sense to add the ability to build MCP servers and expose them for use in your application of choice.
With this, interop becomes a playground where you can test MCP ideas on your local environment and build a customized MCP server for yourself locally.
There is a default MCP server built in. But in case you want to separate the responsibility and group different actions to different servers, you can also define multiple servers and assign commands to MCP servers. Configuring a MCP server is quite similar to commands and projects. You define the name, description and the port of the MCP server.
log_level = "error"mcp_port=8081 # Default MCP port
[mcp_servers.writing]name="writing"description="MCP server that contains writing related tasks"port=8082
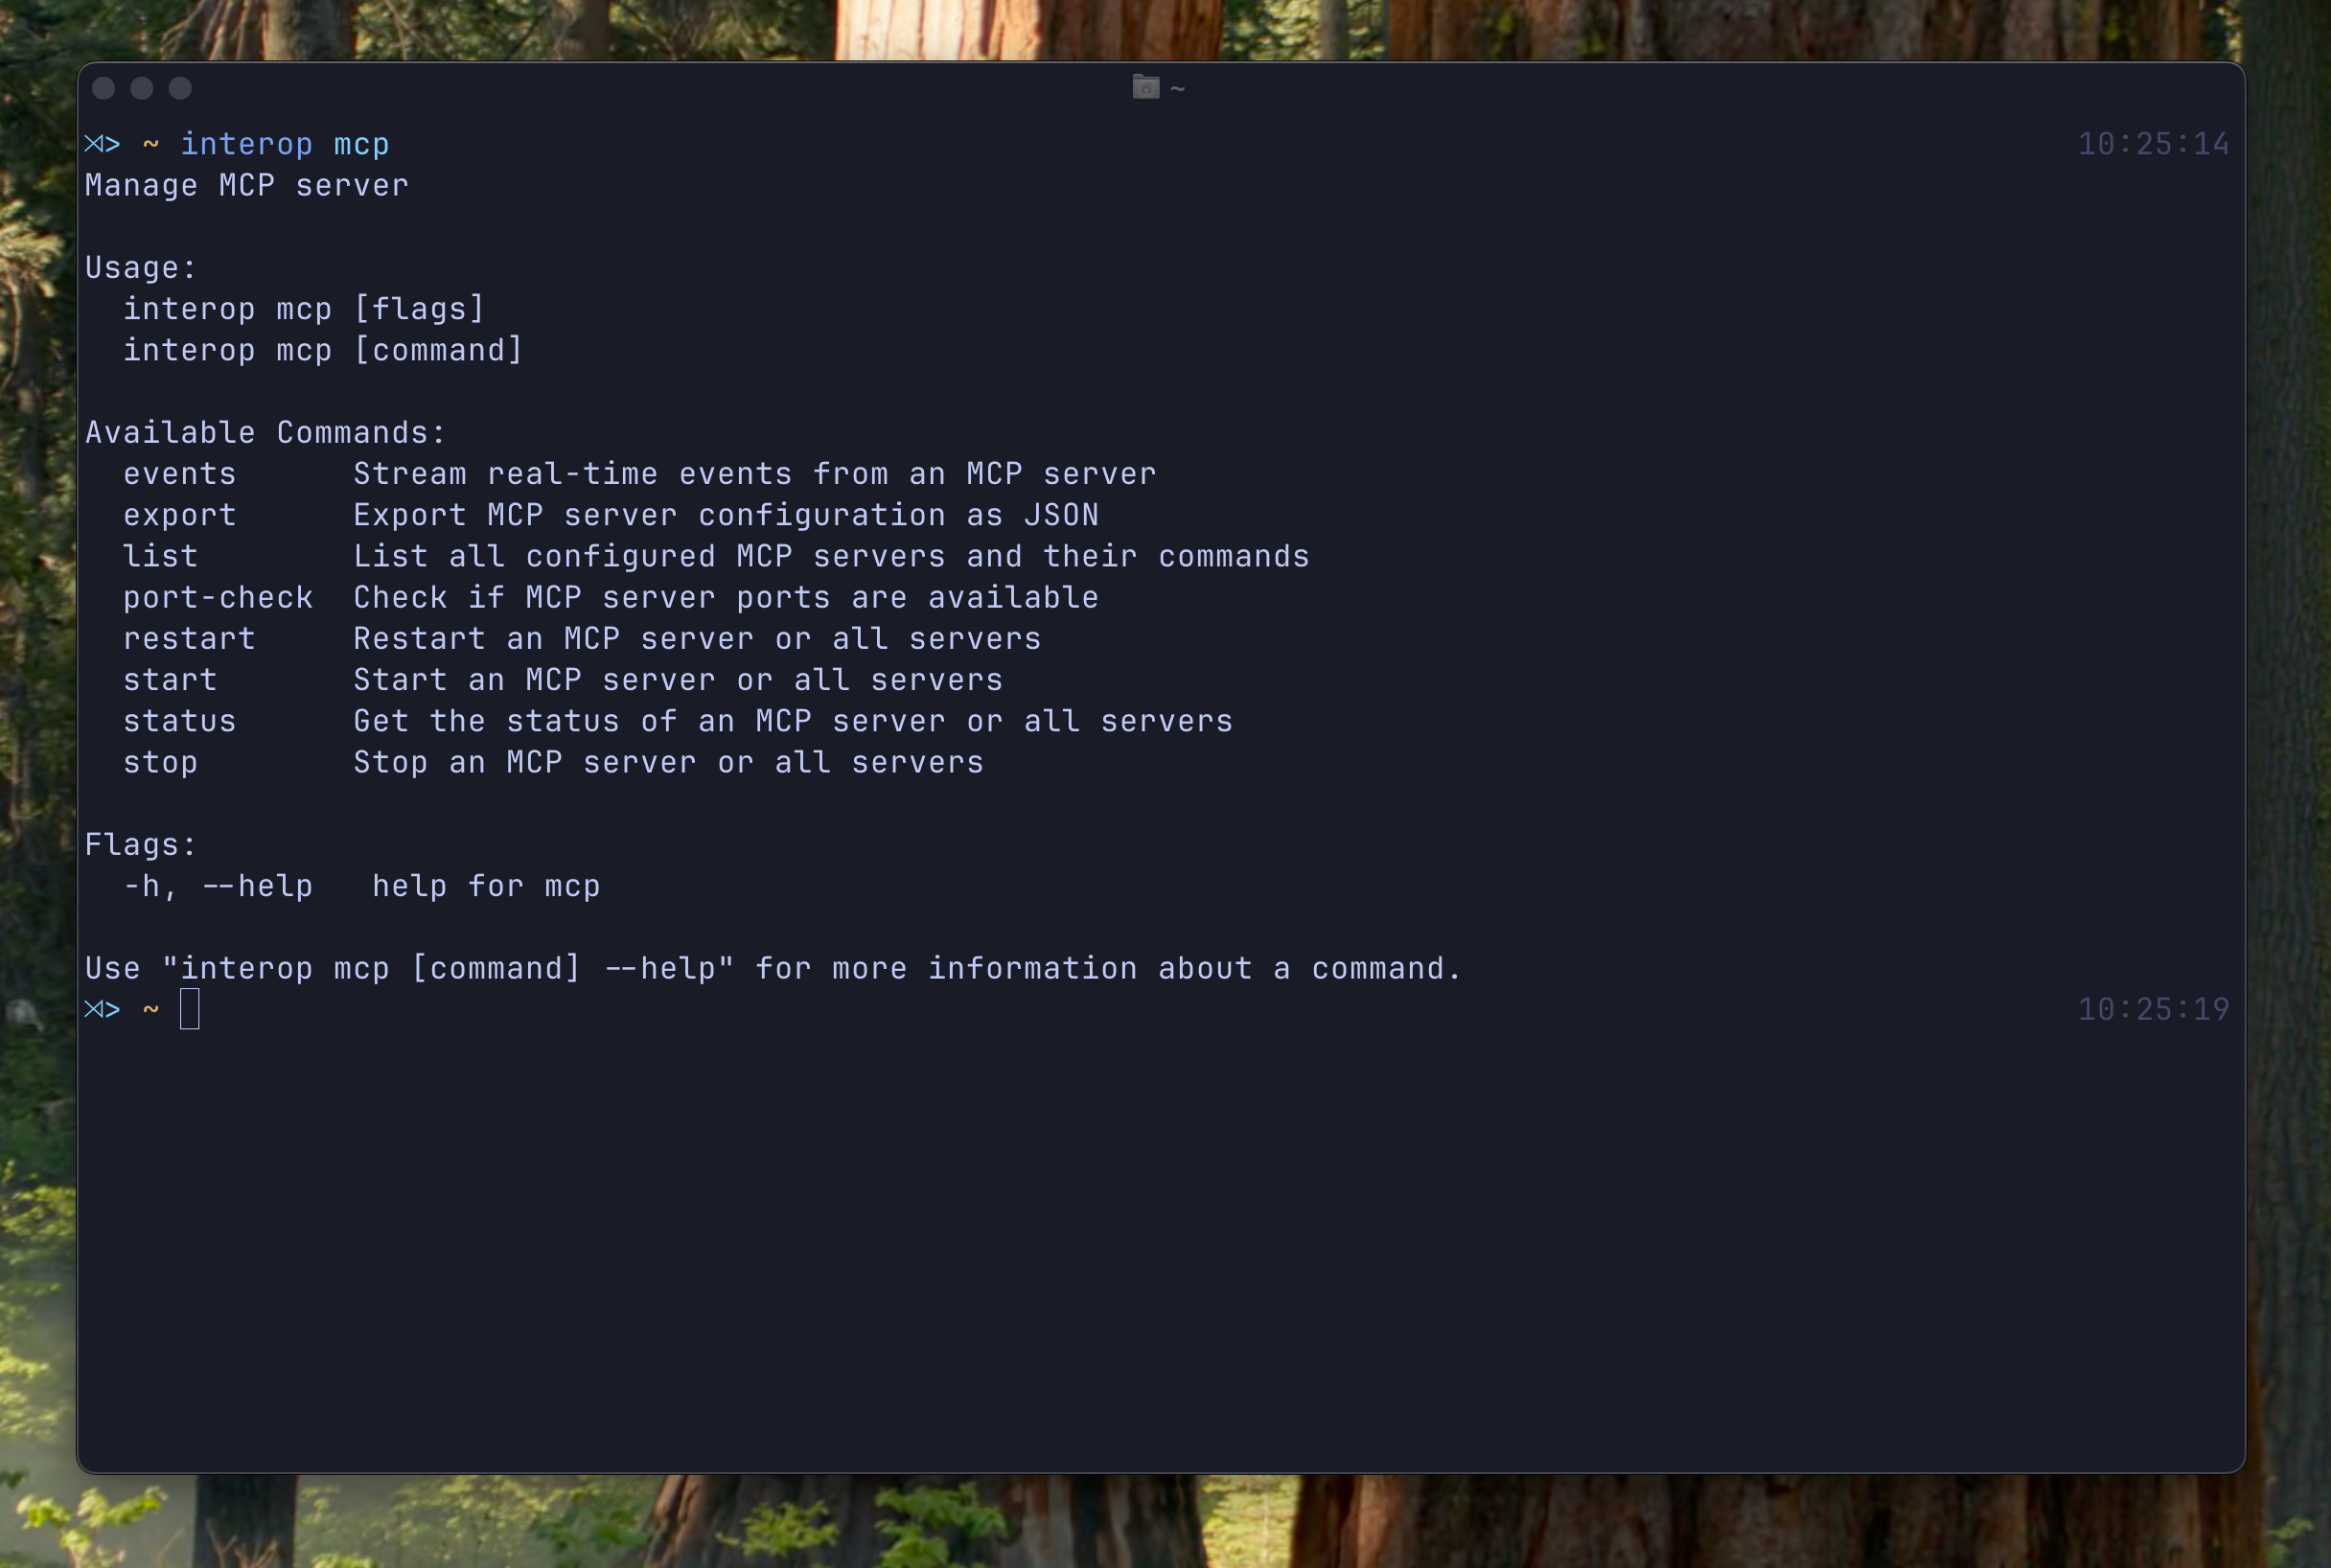
[mcp_servers.development]name="development"description="MCP server that contains development tasks for personal projects"port=8083Commands under mcp aims to improve the configuration and interaction with these mcp servers.
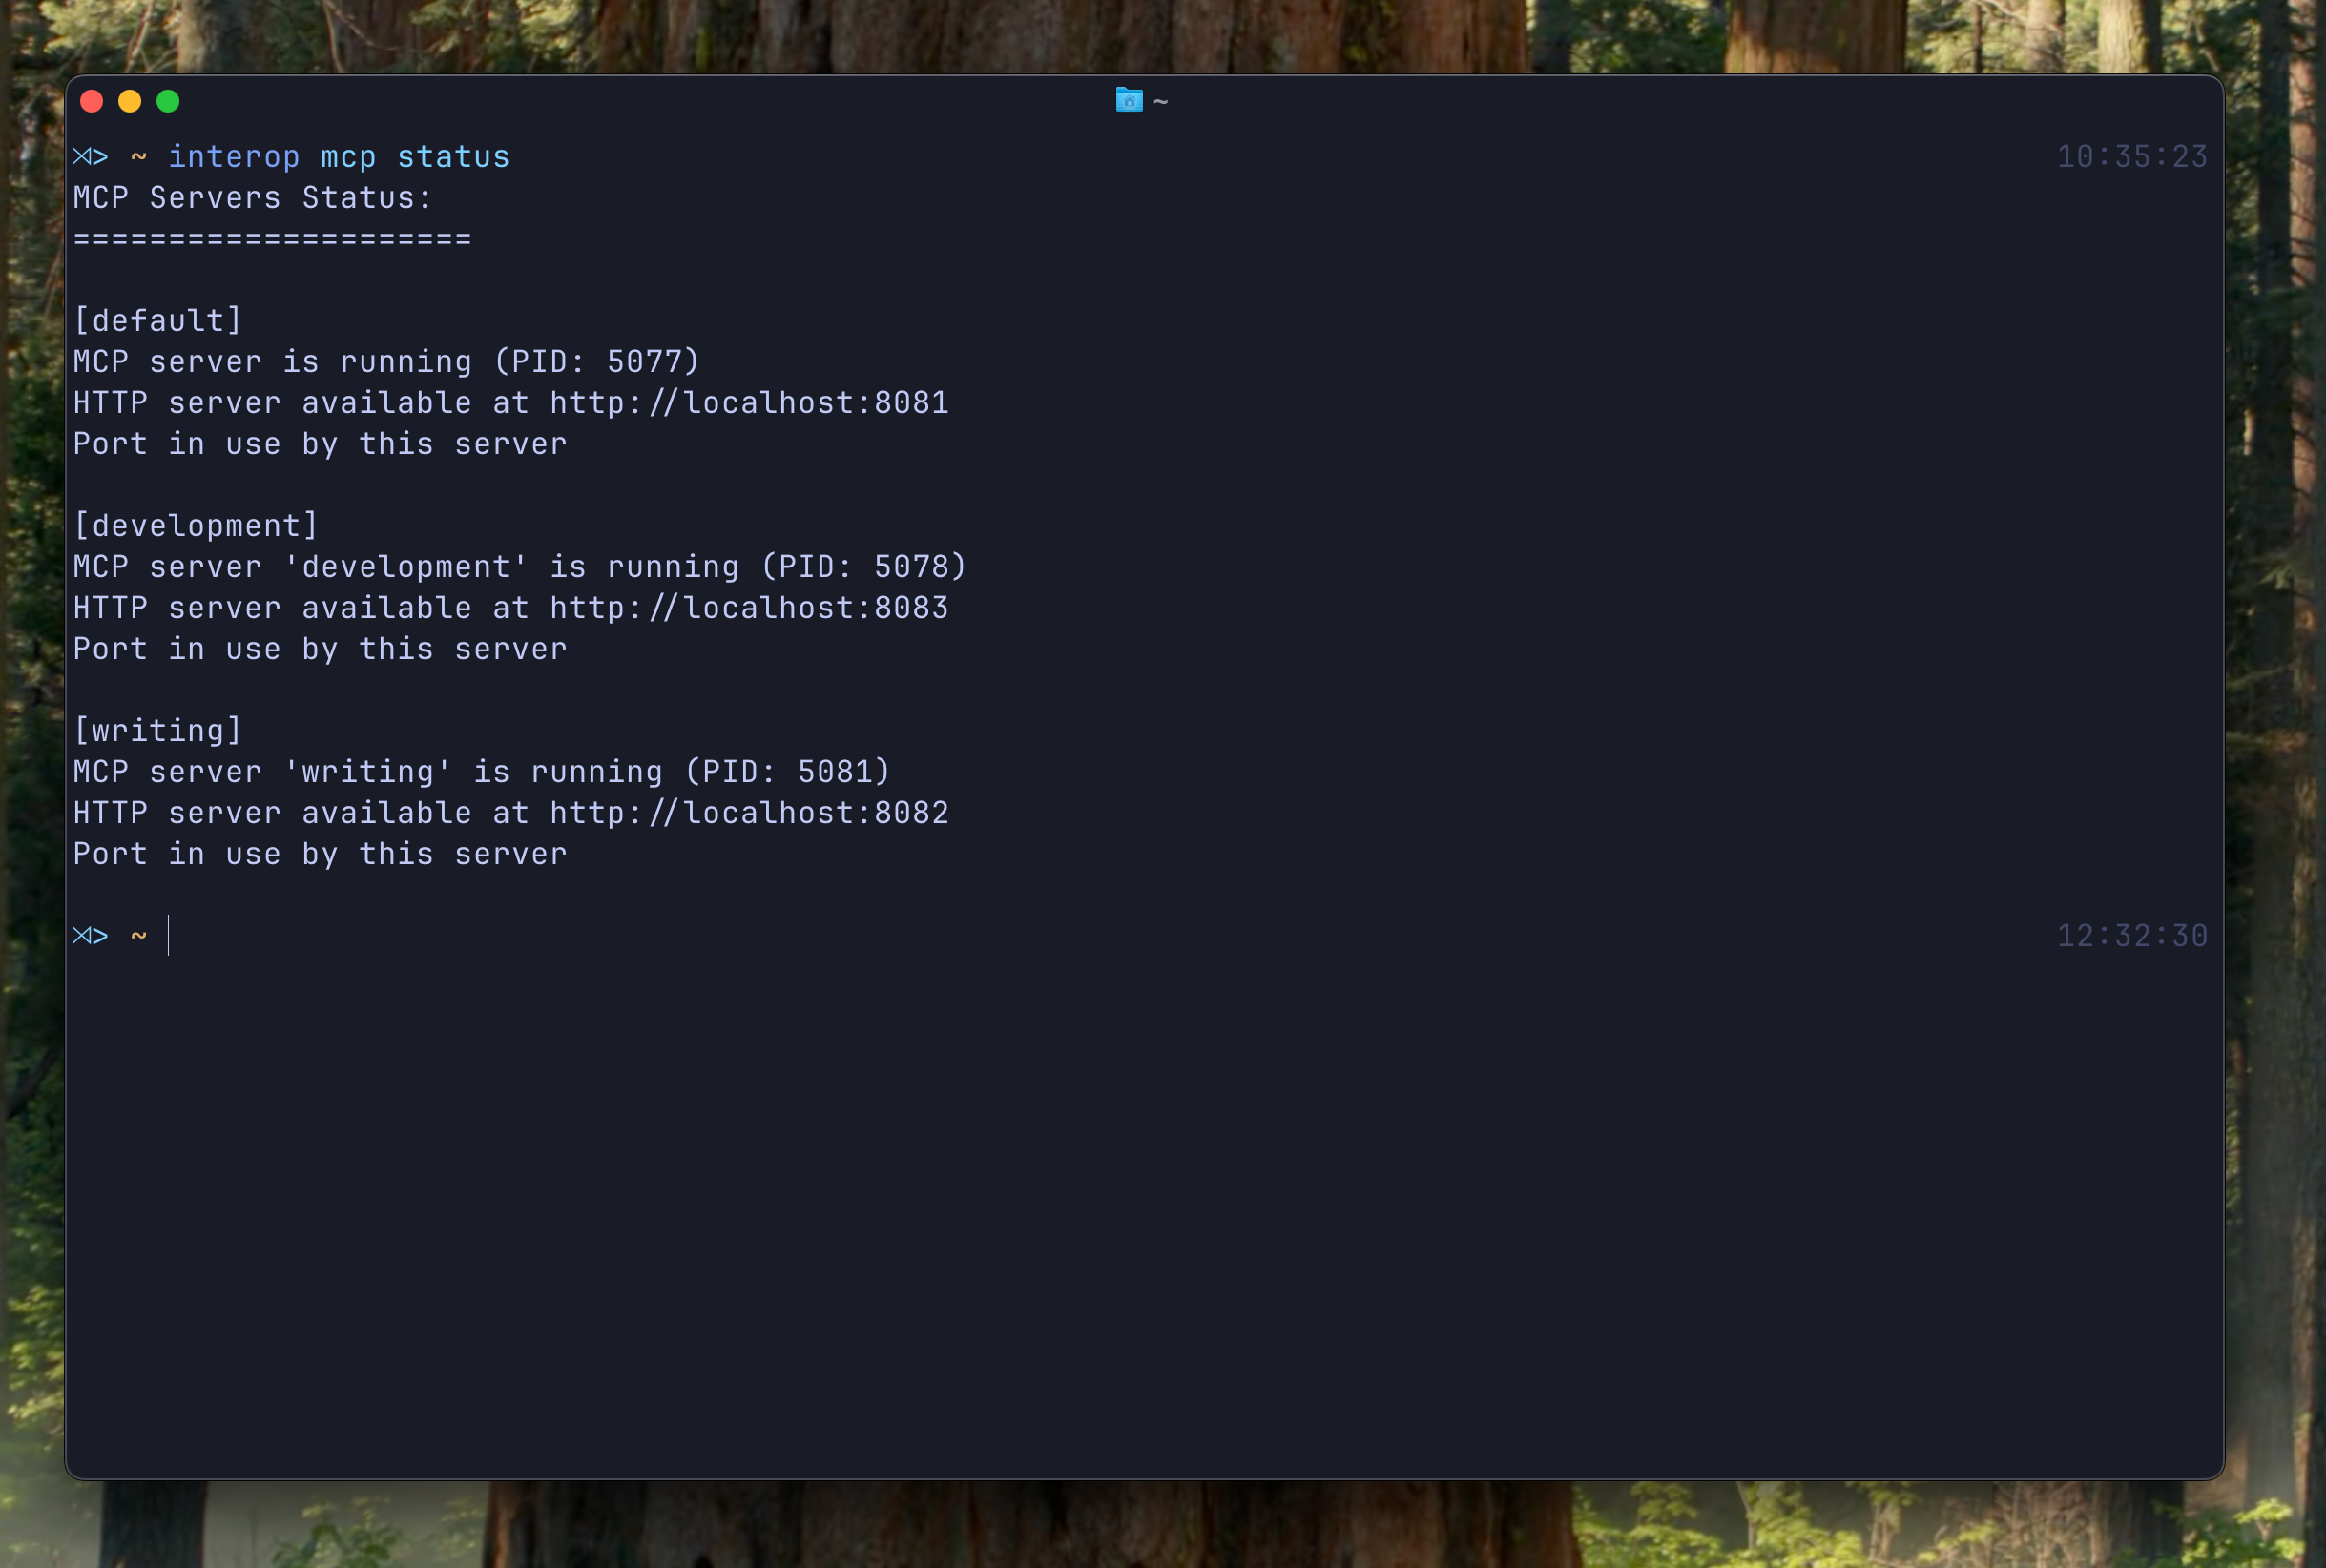
listlets you display mcp servers you define with its overall information and bounded commandsport-checklets you check ports of the mcp servers for diagnostics and debuggingexportlets you create a JSON where you can copy to use these mcp servers.start,stop,restartandstatuslets you control the mcp servers.
Here are the servers we just defined above after starting
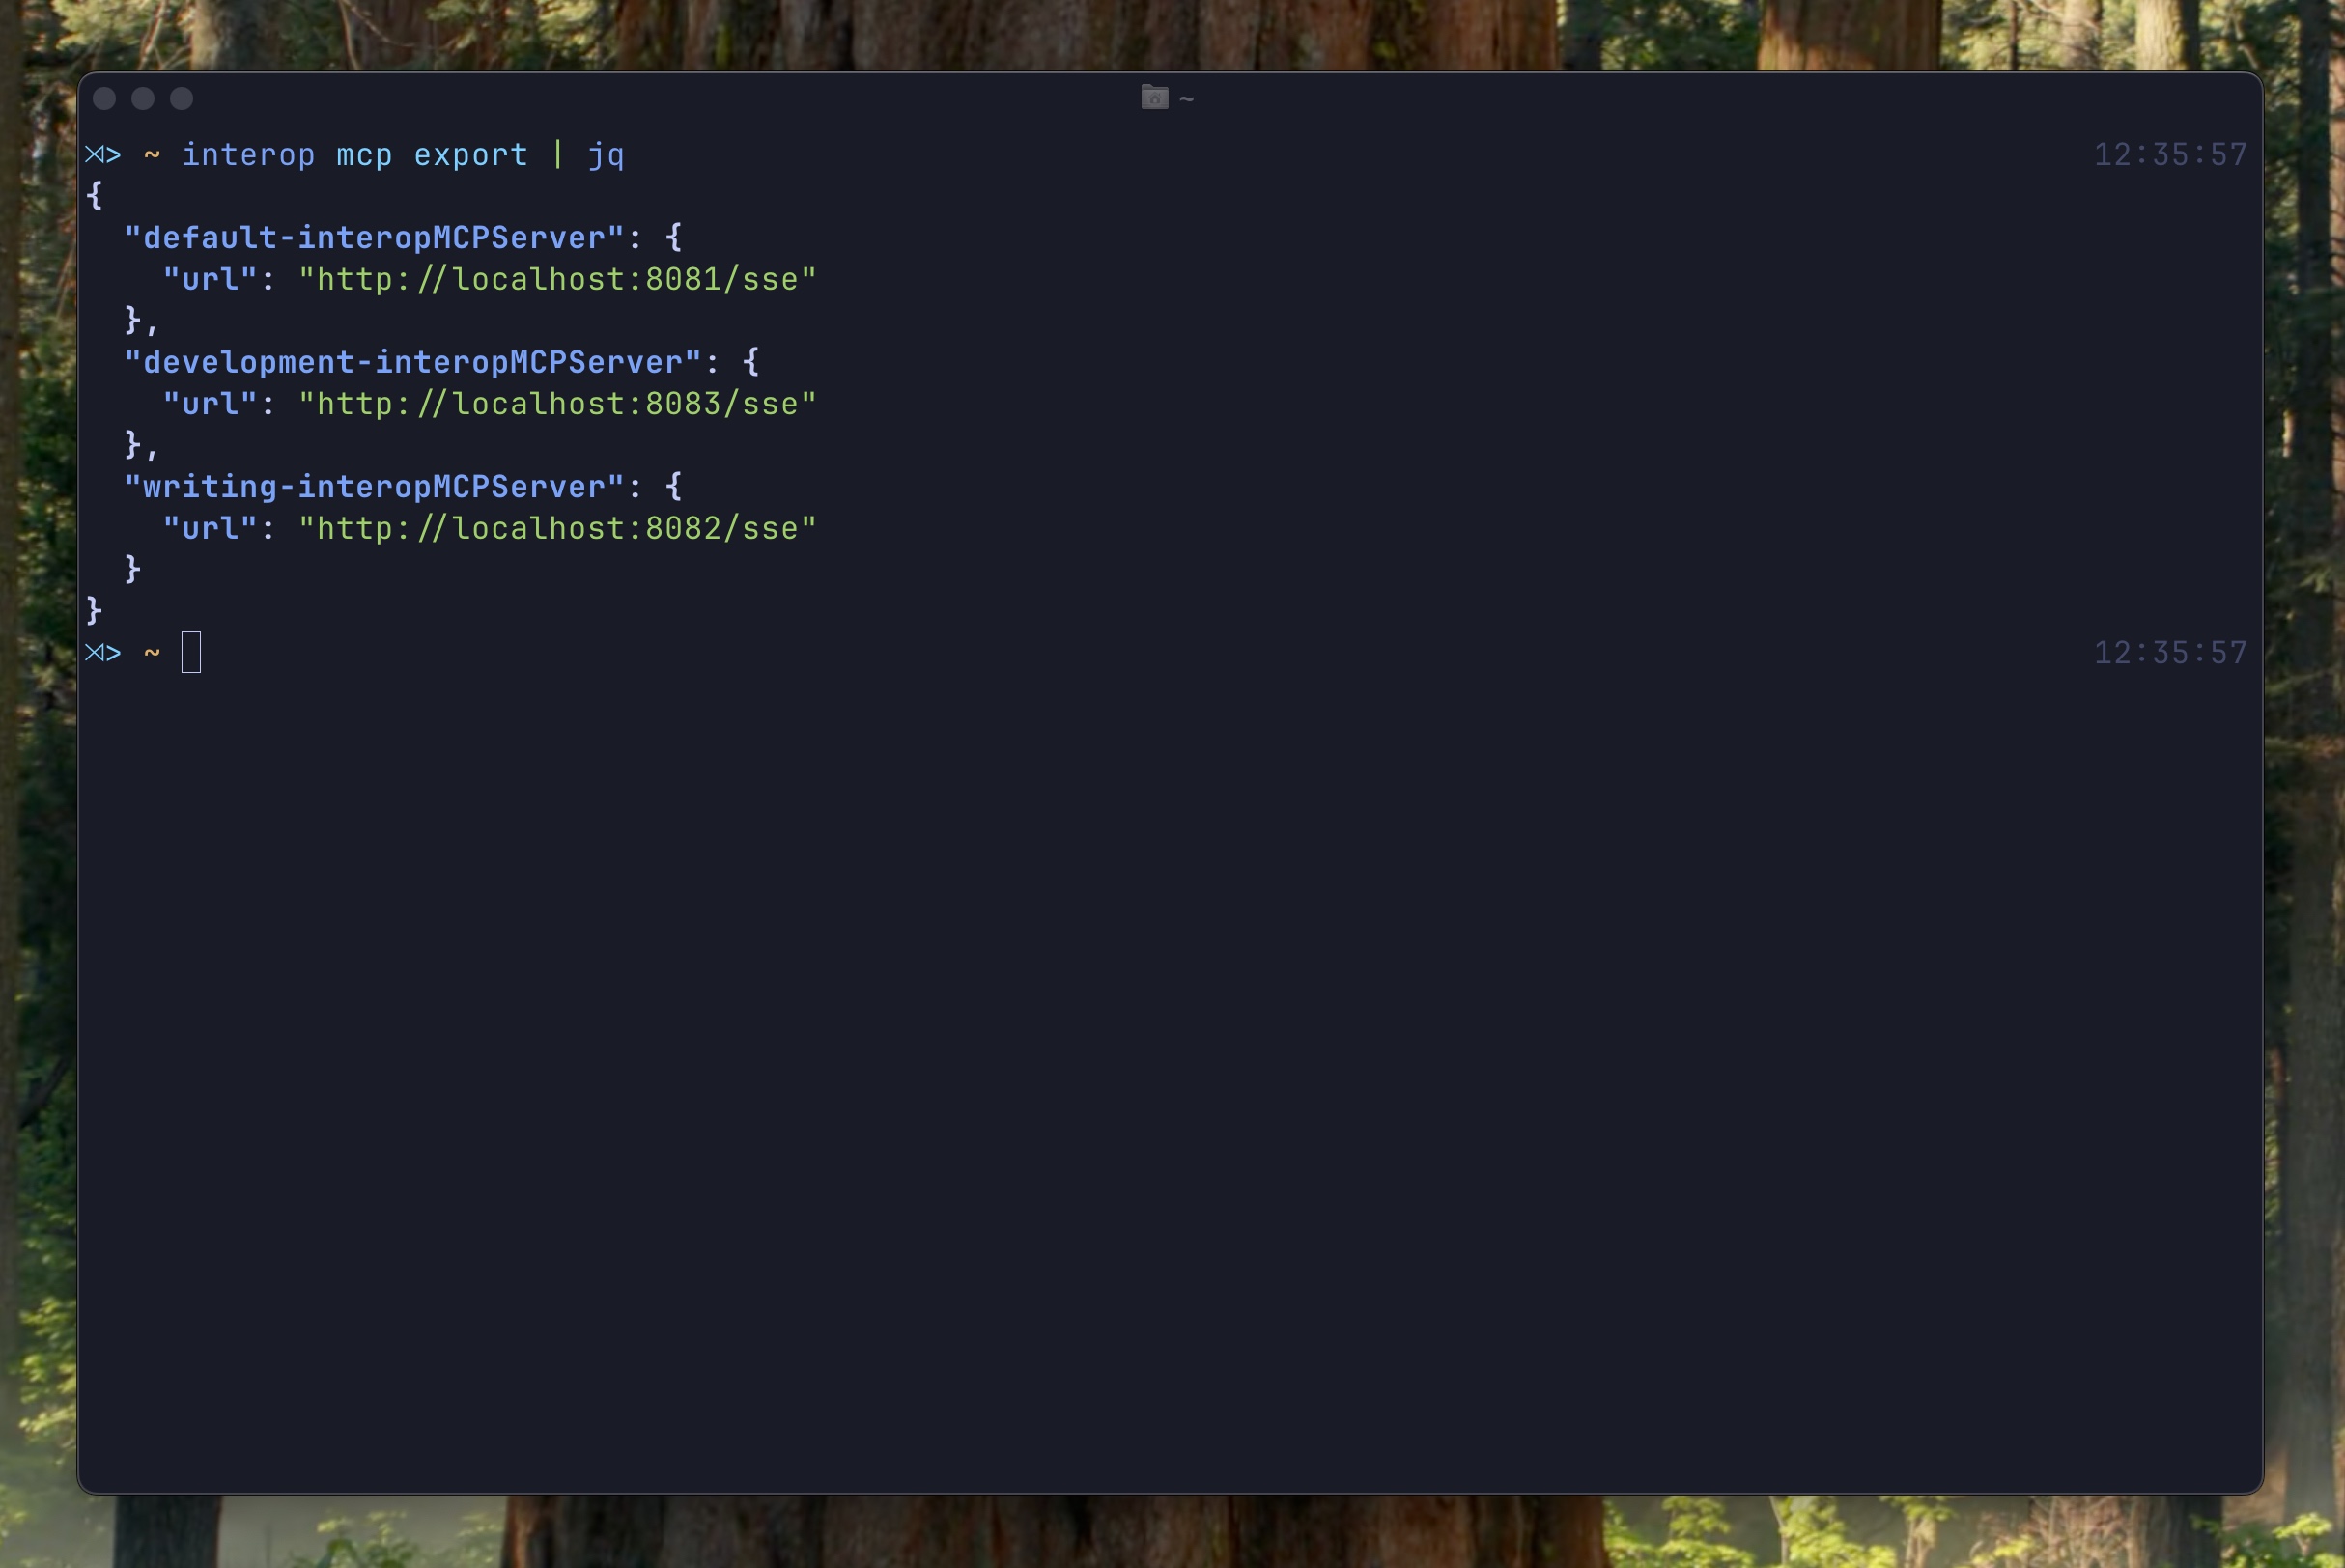
We can export this servers to use (Used jq for colorful output)
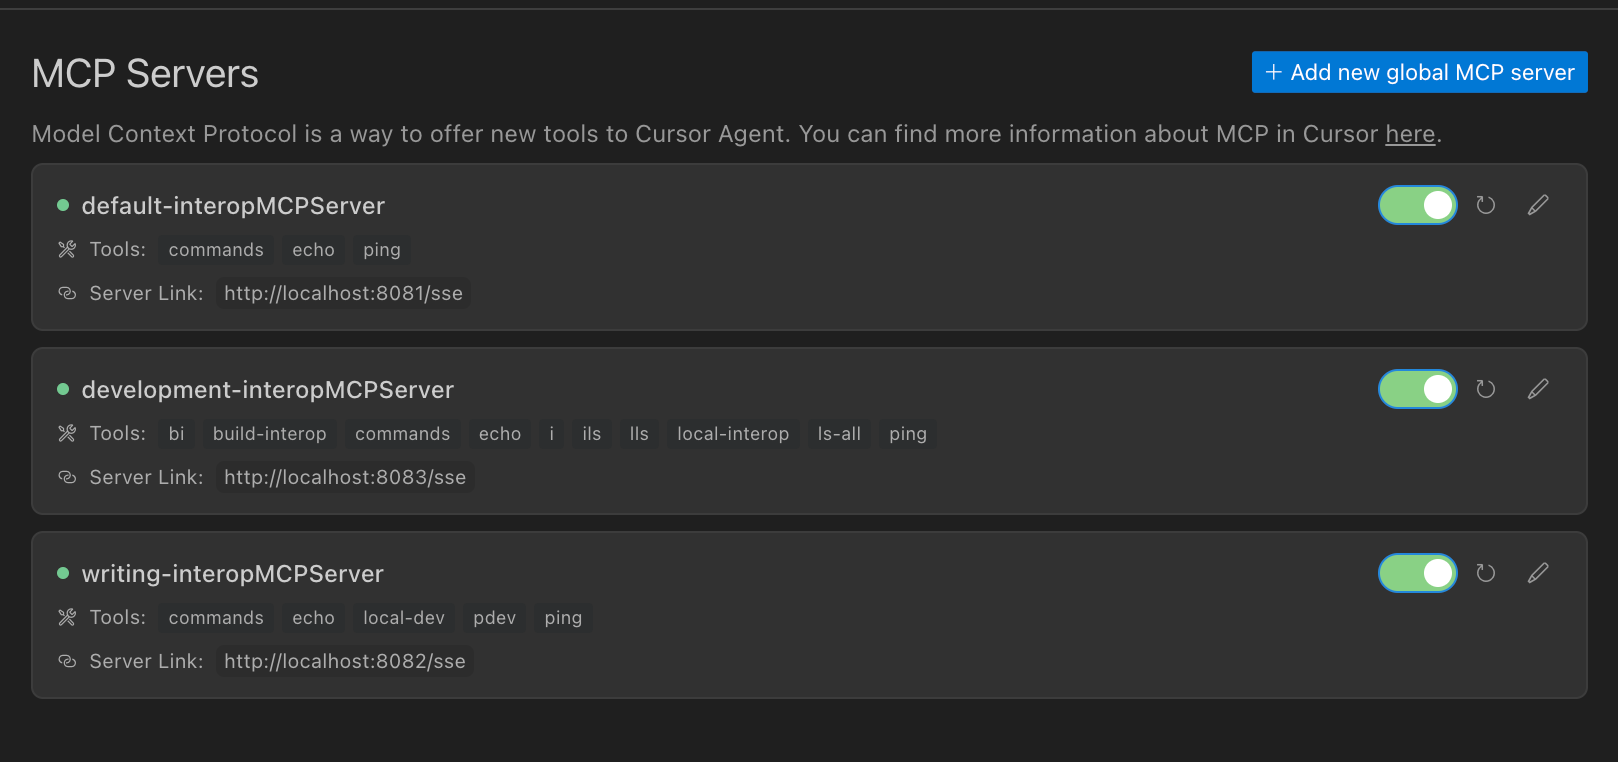
And add it to Cursor to make it avaiable
MCP tools can also be project based
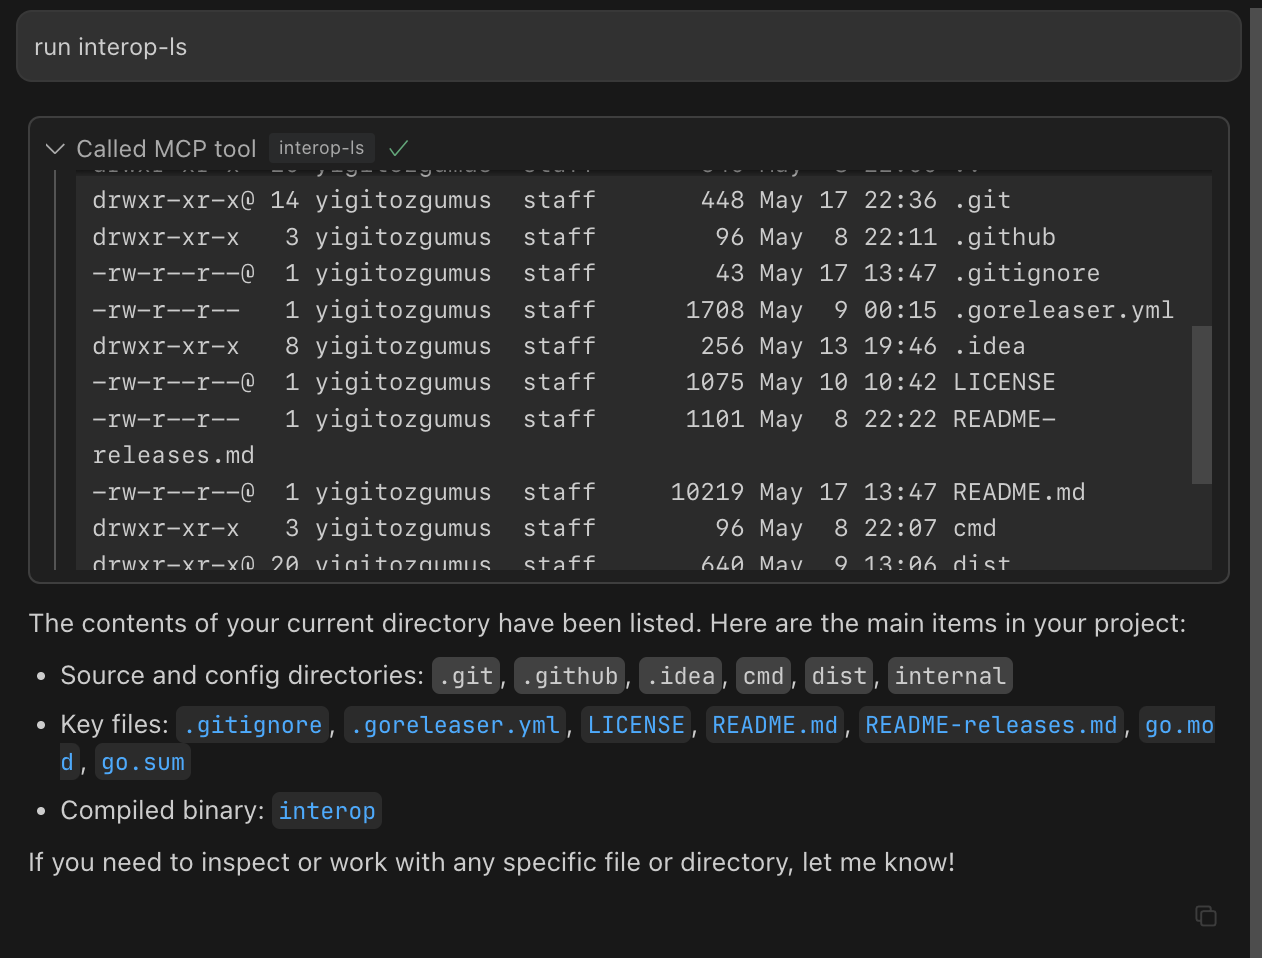
One nice thing about this approach is that when you define a project based command and expose it via MCP to use, mcp call also becomes project based. This means you can tailor the MCP calls you want for your projects, and it eliminates the going to the correct path before executing. Let’s test this behaviour.
First we define a command and bind to two projects.
#...[commands.ls-all]cmd="ls -la"mcp="development"#...[projects.lazydraft]path="~/projects/personal/lazydraft"description="Lazydraft application, tool that makes transferring blogsposts from obsidian to my personal website easier"commands=[  { command_name="ls-all", alias = "lazy-ls" }]
[projects.interop]path="~/projects/personal/interop"description="Tool for executing project based commands"commands = [  { command_name="ls-all", alias = "interop-ls" }]
Then we run interop mcp restart --all to apply the changes

| Interop Project | Lazydraft Project[^2] |
|---|---|
 | 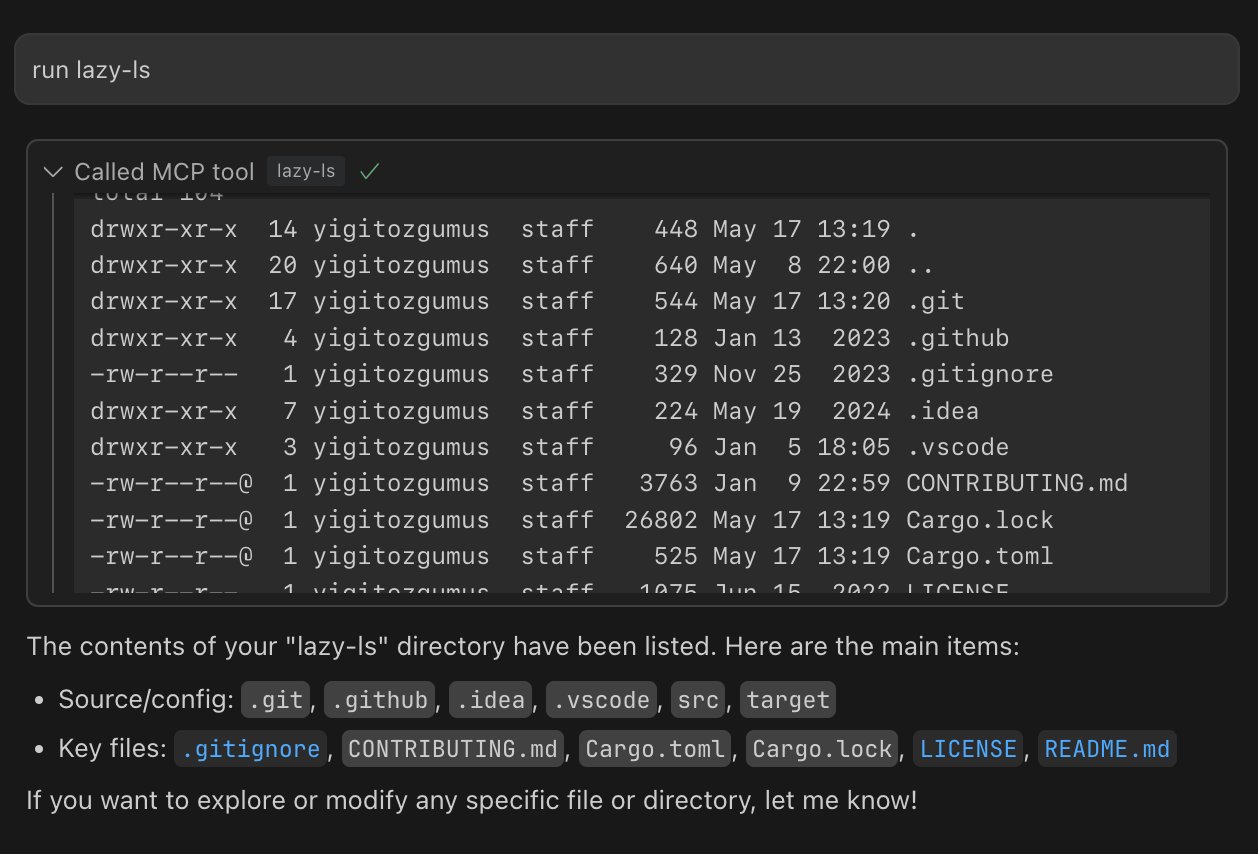 |
It is worth mentioning that interop is an experimental tool. I am planning to add features as I use it more and try to find ways to improve my overall workflow.
You can install with brew using brew install yigitozgumus/formulae/interop
Or you can download the binary straight from the project repository
Cover Photo by Dash Khatami on Unsplash